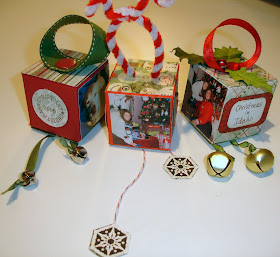

We are so excited to bring you 10 fun filled days of our favorite Photo Ornaments. The video will give you step by step directions to create your own ornaments.


Photo Cube Ornament:
Supplies Needed: 6 x 8 1/2 cardstock or cardstock weight paper (for the cube)
2x2 pieces of pattern paper to decorate the sides
6" of ribbon, wire or pipe cleaner for the hanger at the top
8-12" of ribbon or twine for the bottom
brads, jingle bells, jewels, flowers, etc to decorate your ornament
DIRECTIONS:
Score cardstock at 2, 4, 6, 8
 Turn 1/4 turn and score again at 2, 4
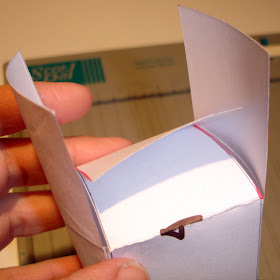
Trim off 1/2 x 2 flaps at top and bottom as shown. Clip along score lines (red lines in photo) up to the next score line.

Glue side flap closed
 Trial fit top and bottom flaps. Adhere 2x2 patterned paper to outer most flap. Find the center point of the flap and pierce a hole. Insert brad through hole.
Repeat for top.
 Apply glue on flaps and seal box closed.
Embellish as desired. Watch the video below for step by step directions and finishing techniques.
Visit our website for Project Kits, information about our Workshop Weekends, Free Crops and more!

Great video and I love the idea. Not too big and you could even put a treat on the inside if you wanted.
ReplyDelete