I've got some mixed feelings about this year's releases. Some of the top companies have produced some good lines, but there are a lot of so-so lines.
I love Cakewalk by October Afternoon and their other lines were cute, but they didn't wow me. Jillibean and Bella both put out some cute lines with even cuter embellishments. Lily Bee has some cute spring lines coming out. Echo park has continued to put out fabulous lines and now are putting out some great new mini lines that are sure to please many. Authentique has some beautiful lines coming out. Teresa Collins has a new navy and yellow line called Everyday Moments that's beautiful which is one of Kerry's favorites of the show. As always we liked the new Simple Stories papers and mini albums. We also came across a new company called Basically Bare that has some great mixed media albums that I can't wait to get my hands on. Graphic 45 has a cool new kraft line coming out too.
On the flip side, MME and Cosmo Cricket, two of my absolute favorites, failed to impress me this year. They each have a line or two that I like, but nothing I felt I needed to run out and buy.
We've posted some pictures on our facebook page from yesterday and will post more over the coming days. Additionally, we've only visited about half of the booths, so check back for more details in the next few days!
Happy Scrappin'!
Darcie

Monday, January 30, 2012
Tuesday, December 20, 2011
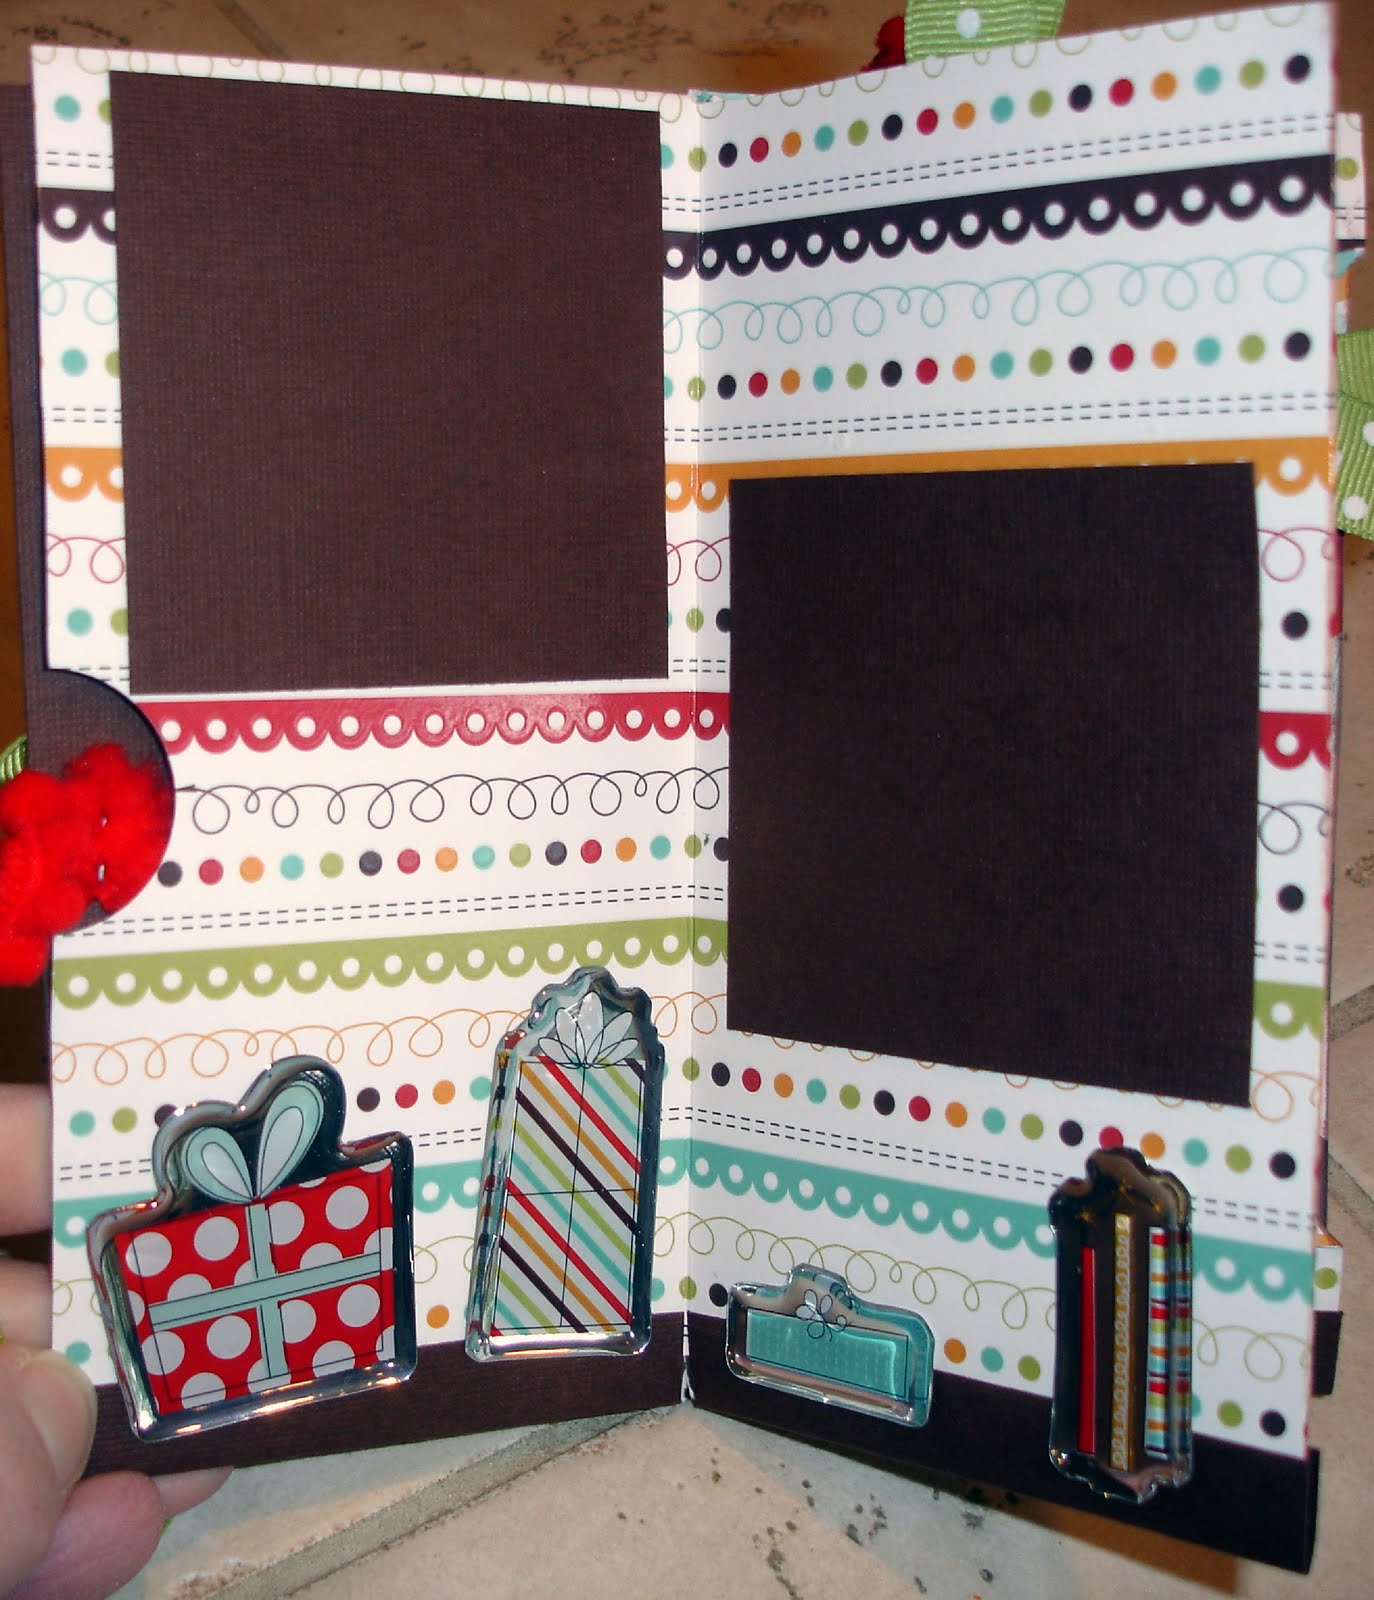
Day 10 Flip Top Box with Accordion Insert-10 Days of Christmas Gifts
Our final 10 Days of Christmas Gifts project is a fun and sort of non pc project. It is a flip top box that is designed by taking apart a hard pack of cigarettes to make the pattern. Kind of funny, but oh so cool. This is definitely a template project and we included the template in the instructions below. Inside our box we included an accordion album with tags and a spot for a gift card. 
Supply List:
8 1/2 x 11 Cardstock for Box
1 piece 12 x 12 patterned paper or cardstock for insert
Paper or cardstock scraps for tags
Paper scraps or stickers for embellishment
Ribbon– 2 feet of ribbon for tags (1 foot each of 2 different ribbons)
18” of twine or string
12” of ribbon to tie around box
Jingle Bell
2 Medium Brads
Tools: Paper Trimmer, Scissors, Scorpal or Scoring Tool and Ruler, 3/4” circle punch, tag corner punch, hole punch

 This is the template for the box, right click on the photo and save it to your computer. Print as a full sheet (8 1/2 x 11). You can also print this directly onto your cardstock- which is how I made our sample.
 Print box template onto the back side of 8 1/2 x 11 cardstock or patterned paper.
Cut along all the solid lines - don't cut the dashed lines.
Score and fold all of the dotted lines.
 Make the main box by sticking the bottom tabs [a] to the inside of the bottom of the box [b].
Now stick the sides [c] over the side flaps [d].
The lid: stick the flaps [e] to the underside of the top of the packet [f].
Stick the sides of the lid [g] over the flaps [h].
Finally, fold back the lip [i] under the front of the lid [j] and stick.
Cut out insert along solid lines, or just cut straight across and punch out curve with an oval punch. I used a 1 3/4” Stampin Up Punch.
Glue insert inside of the box if desired.
 To Finish the box:
Punch out two 3/4” circles. Glue to box. Insert brad through each circle.
Tie 18” of twine or string to bottom brad, wrap around and tie so the knot is hidden.
Embellish your box as desired.
I tied 12” of ribbon around and tied on a jingle bell.
I also added a cut out from my patterned paper
Now on to the accordion insert:
 Accordion Album Insert:
Cut patterned paper or cardstock to 5 1/2 x 11 3/4
Score at 2 1/2”
Turn and score at 1/4” from each short edge.
Trim longer flap from short edge.
Fold piece closed and adhere flaps so you have created one long pocket.
Score every 2 1/4” across pocket, creating five small pockets.
Use your bone folder to make sure all of your folds are nice and sharp.
Supply List:
8 1/2 x 11 Cardstock for Box
1 piece 12 x 12 patterned paper or cardstock for insert
Paper or cardstock scraps for tags
Paper scraps or stickers for embellishment
Ribbon– 2 feet of ribbon for tags (1 foot each of 2 different ribbons)
18” of twine or string
12” of ribbon to tie around box
Jingle Bell
2 Medium Brads
Tools: Paper Trimmer, Scissors, Scorpal or Scoring Tool and Ruler, 3/4” circle punch, tag corner punch, hole punch
 This is the template for the box, right click on the photo and save it to your computer. Print as a full sheet (8 1/2 x 11). You can also print this directly onto your cardstock- which is how I made our sample. Print box template onto the back side of 8 1/2 x 11 cardstock or patterned paper.
Cut along all the solid lines - don't cut the dashed lines.
Score and fold all of the dotted lines.
 Make the main box by sticking the bottom tabs [a] to the inside of the bottom of the box [b].
Now stick the sides [c] over the side flaps [d].
The lid: stick the flaps [e] to the underside of the top of the packet [f].
Stick the sides of the lid [g] over the flaps [h].
Finally, fold back the lip [i] under the front of the lid [j] and stick.
Cut out insert along solid lines, or just cut straight across and punch out curve with an oval punch. I used a 1 3/4” Stampin Up Punch.
Glue insert inside of the box if desired.
 To Finish the box:
Punch out two 3/4” circles. Glue to box. Insert brad through each circle.
Tie 18” of twine or string to bottom brad, wrap around and tie so the knot is hidden.
Embellish your box as desired.
I tied 12” of ribbon around and tied on a jingle bell.
I also added a cut out from my patterned paper
Now on to the accordion insert:
Accordion Album Insert:Cut patterned paper or cardstock to 5 1/2 x 11 3/4
Score at 2 1/2”
Turn and score at 1/4” from each short edge.
Trim longer flap from short edge.
Fold piece closed and adhere flaps so you have created one long pocket.
Score every 2 1/4” across pocket, creating five small pockets.
Use your bone folder to make sure all of your folds are nice and sharp.
Tags:
3 1/4 x 2, clip the top corners to make a tag shape.
Punch out 3/4” circles from patterned paper and add to tags.
Tie ribbon through the top of each.

3 1/4 x 2, clip the top corners to make a tag shape.
Punch out 3/4” circles from patterned paper and add to tags.
Tie ribbon through the top of each.
Monday, December 19, 2011
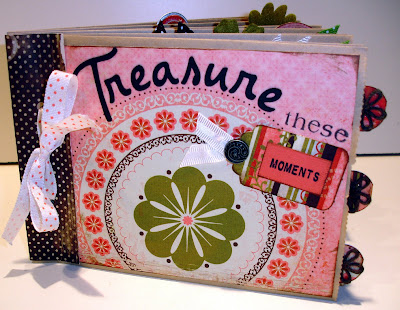
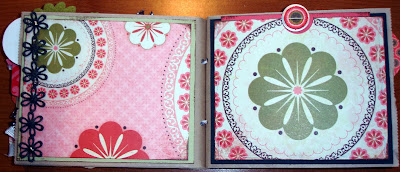
Day 9 One Sheet Mini Album-10 Days of Christmas Gifts
For our 9th Day of $10 or less Christmas Projects we are bringing you a One Sheet Mini Album (the album itself is just one sheet of paper, the inserts, tags, etc require some cardstock- but not too much).

The photos of the Birthday Album are from one of our classes that we taught at our Workshop Weekend in February 2011. They will help you figure out how to customize your project once you have the album constructed.

The photos of the Birthday Album are from one of our classes that we taught at our Workshop Weekend in February 2011. They will help you figure out how to customize your project once you have the album constructed.
1. Score and fold your paper at 6", open up.
 2. Turn, score and fold your paper again at 6", do not open up.
 3. Score your paper at 3" along the entire length, crease and open back up.
 4. Cut along crease line as shown.
 5. Open up and fold paper in half horizontally-the cut section should be along the top. Stand the book up- the fold should be along the top edge. A diamon should form in the middle.
 6. Push the two ends together.
 7. Take the left end and fold to the front to form a cover.
 Get creative with the pockets that form on the sides and top of your book. Use our sample as an inspiration for your project.


 When your book is done you can wrap a ribbon around it and tie it closed.
Have fun!
2. Turn, score and fold your paper again at 6", do not open up.3. Score your paper at 3" along the entire length, crease and open back up.4. Cut along crease line as shown.5. Open up and fold paper in half horizontally-the cut section should be along the top. Stand the book up- the fold should be along the top edge. A diamon should form in the middle.6. Push the two ends together.7. Take the left end and fold to the front to form a cover.8. Crease the spine and your pages again and you are done.
Use a stapler or paper strips to seal up the openings along the bottom of the book. You are ready to fill all of those little pockets with tags and photo mats!
For our birthday book below- we used 1 x 3" strips of cardstock folded in half lengthwise and glued them along the bottom edges of our book.
 Get creative with the pockets that form on the sides and top of your book. Use our sample as an inspiration for your project.

 When your book is done you can wrap a ribbon around it and tie it closed.
Have fun!
Sunday, December 18, 2011
Day 8 A Paper Bag Album-10 Days of Christmas Gifts
Our project for today is a really fun idea to incorporate LOTS of photos into a great gift book. It is all made from paper bags and then decorated with some beautiful paper and embellishments. The fun thing about making a mini book from paper bags is you end up with a pocket at the end of each page to include more photos, or journaling.
 Supply List:
6 Lunch Size Paper Bags
 Cover-
Cut 6x5 piece of patterned paper. Die cut letters using Cricut for title-approx 2” Letters. Add stamped words and tag. Use a scrap piece of cardstock to add words to your tag if the pattern is too bold. Add decorative brad and ribbon to tag and adhere to cover.
 Left Page-Stripe 6x5
Dot 6x1-adhere onto stripe
Thread tag onto rick rack and staple rick rack onto paper before you adhere to page.
Right Page-Dot 6x5
Pink Cardstock-5x4
Staple ribbons to top edge of cardstock mat.
 Left Page-Brown Cardstock 6x5
Pattern 5 3/4 x 4 3/4
Wrap ribbon around left edge
Stamp on circle tag and tie onto ribbon.
Right Page-Dark Pink cardstock 6x7, fold up 2” on bottom
Pattern 5 3/4 x 1 3/4, add to pocket front, use brads to create pocket.
Tags-use punch out tag from sheet and staple ribbon to top
Cut 3x5 tag from Lt Pink cardstock-add flower and button.
 Left page-Green cardstock 6x5
Pattern 1x5
Punch out tags from sheet, staple ribbon onto edges and adhere
Right Page-Pattern 6x5
Cut 2” square of green cardstock and adhere to wrong side of right corner, fold down and secure with brad
Add circle tag behind


 Supply List:
6 Lunch Size Paper Bags
3-5 sheets 12x12 coordinating patterned papers-I used 5 sheets of My Minds Eye Patterned Paper
5 sheets 12x12 cardstock
4-6 coordinating ribbons or trim for tags and embellishment-1 or 2 feet of each
Embellishments: I used My Minds Eye Punch Out Tags, Creative Café felt flowers, buttons, decorative brads
5 sheets 12x12 cardstock
4-6 coordinating ribbons or trim for tags and embellishment-1 or 2 feet of each
Embellishments: I used My Minds Eye Punch Out Tags, Creative Café felt flowers, buttons, decorative brads
Get our your favorite stamps, rub ons, stickers to embellish your book!
To create book
Cut folded end off bags so they measure 7 1/2” long.
It is easier to cut and assemble each page before you bind book together. Cut 3 x 5 1/4 piece of your other coordinating paper that you will use to bind your edge. Lightly fold in half. Place over binding and punch using Cropadile through all layers, 1” from ends and 1/2” from binding. Cut 15” of ribbon to tie and set aside with binding piece. When all pages are done you will tie with 15” of ribbon, reinforce holes if desired with paper punch outs or boshers.
To create pages and pocket inserts
Cut each of your patterned papers and cardstock pieces into 6x12 pieces, we will use these strips to create each page. All pages are 6” wide x 5” tall.
Cover-Cut 6x5 piece of patterned paper. Die cut letters using Cricut for title-approx 2” Letters. Add stamped words and tag. Use a scrap piece of cardstock to add words to your tag if the pattern is too bold. Add decorative brad and ribbon to tag and adhere to cover.
 Left Page-Stripe 6x5
Dot 6x1-adhere onto stripe
Thread tag onto rick rack and staple rick rack onto paper before you adhere to page.
Right Page-Dot 6x5
Pink Cardstock-5x4
Staple ribbons to top edge of cardstock mat.
Left Page-Brown Cardstock 6x5Pattern 5 3/4 x 4 3/4
Wrap ribbon around left edge
Stamp on circle tag and tie onto ribbon.
Right Page-Dark Pink cardstock 6x7, fold up 2” on bottom
Pattern 5 3/4 x 1 3/4, add to pocket front, use brads to create pocket.
Tags-use punch out tag from sheet and staple ribbon to top
Cut 3x5 tag from Lt Pink cardstock-add flower and button.
Left page-Green cardstock 6x5Pattern 1x5
Punch out tags from sheet, staple ribbon onto edges and adhere
Right Page-Pattern 6x5
Cut 2” square of green cardstock and adhere to wrong side of right corner, fold down and secure with brad
Add circle tag behind
Left page-5x6 Med Pink cardstock
Brown dot-4 1/2 x 4 1/2
Use punch out tag and patterned paper scrap, stamp words onto scrap and staple ribbon to tag.
Right Page-8x5 Med Pink cardstock, fold 2” along right edge for flap
Pattern-5 3/4 x 4 3/4
Stripe-1 3/4 x 4 3/4
Light Pink-1 3/4 x 4 3/4
Stamp words on front of flap, add flower and punch out tag.
Staple tab onto flap

 Left Page-5x6 Patterned paper.
Attach felt trim with brads at top and bottom
Right Page-5x6 Brown cardstock
Pattern-4 3/4 x 5 3/4, punch out half circle along top. Staple to brown cardstock to create pocket.
Medium Pink-5x4, add metal rim tag and punch out top top.
 Back Cover
Cardstock 2 1/2 x 6
Pattern 2 1/2 x 6
Dot 1x6
Stamp “Handmade By” and sign your name
Bind book by wrapping binding piece around edge and threading through all layers. Knot ribbon and then tie into bow
 Pocket Inserts
Each piece is 5x6
Embellish the edges as desired with punch out tags, ribbon, etc.
Green-3 circle tabs, add felt flower from trim to each
Dark Pink-Fold over tag from punch out sheet
Brown-Staple on rick rack and ribbon
Lt Pink-File folder tab, stamp word on it, staple to edge
Green-Punch out circle tag from sheet
Med Pink-Use punch out strip from sheet, add punch out tag.
Saturday, December 17, 2011
Day 7 Laced Stand Up Display-10 Days of Christmas Gifts

This beautiful and fun project is a great way to commerate all of your Santa photos from over the years. These are pictures of my brothers and sister and me that I scanned and printed to create this for my mom. (see warning below about reprinting Santa photos)- This is actually a large piece-35" long- the panels are all 5x7, so it would be a great display on a mantle or even down the center of a dining table- you could decorate both sides if you want.
 I used chipboard and then covered it with patterned paper and cardstock for my panels.
For this fun project you can use up some of those odds and ends in your stash. I found some old metal charms, a metal quote, some flowers, etc.
Supplies:
3- 12 x 12 Chipboard or 7 pieces 5x7
4- 12 x 12 Pieces of Patterned Paper
3-12 x 12 Cardstock (Red, White, Green)
Ribbon:
1 foot Green Velvet Rick Rack
4" Red Rick Rack
4 feet Red Ribbon
3 feet Brown Check Ribbon
2 Feet Skinny Green Ribbon
Misc. Charms and embellishments
Cricut to cut your letters or trace and cut or use large stickers or die cuts.
Tools: Cropadile,
Directions:
Cut chipboard into 7 pieces- 5x7 (if you make your first cut as a 7x12, then you can cut that into two pieces 5x7 and the remaining piece will be 5" wide so you can cut another 5x7)
Cut Patterned paper into 5x7" pieces so you have 7 pieces (I used 4 different patterns, you could use more or less).
Cut cardstock into 5x7 pieces
Adhere patterned paper to the front of the chipboard piece and a piece of cardstock to the back.
Using a heavy duty hole punch or cropadile punch 4 holes on the long side of each panel, I started at 2" from bottom, then spaced them every 1". Punch one panel and use that as your template to punch the remaining panels.
You will use 12" of ribbon to lace each set of panels together. Start on the backside, and lace the panels so you end up with 2 "X's" on the front. You should end with your cut ends at the back. Tie.
Repeat and lace all panels.
Repeat and lace all panels.
 To decorate your panels
Cut letters using your Cricut or trace and cut out letters. My letters range from 2 1/2" - 3". Decorate your letters with trim, ribbon, embellishments, etc.
My photos are all printed 3x4, I trimmed a few of them down slightly.
A warning about trying to reprint old Santa photos - they are copyrighted and some stores will not re-print them.

B-White Tag-2 3/4 x 4 1/2

E-Plaid Mat- 4 1/2 x 3 1/2
L-Red Pattern-4 1/4 x 3 1/4
L-Red Pattern-4 1/4 x 3 1/4

I-Red Cardstock-4 1/4 x 3 1/4
E-White Cardstock-4 1/4 x 3 1/4
E-White Cardstock-4 1/4 x 3 1/4
V-Green Cardstock- 4 1/4 x 3 1/4, cut down photo and add rick rack across top
Tie remaining ribbon to open holes on the first and last panels as shown.
Tie remaining ribbon to open holes on the first and last panels as shown.
Friday, December 16, 2011
Day 6 Photo Blocks-10 Days of Handmade Gifts for $10 or less
Our Day 6 project is a set of 2x2 wood blocks- such a fun photo display for a coffee table or desk.
 Supplies:
6-2x2 wood blocks (you can find these at a craft store like Michaels or Hobby Lobby)
3 pieces patterned paper
1 piece 12 x 12 Cardstock
Acrylic Paint
Sand Paper
Mod Podge
Sticker Letters or use a Cricut to cut out your letters, rub ons or stamps
Paint edges of all blocks.
Cut one 2x12 strip from each paper. Trim strip into squares just slightly smaller than 2x2.
Cut 4x6 photo(s) into 2x2 squares.
Cut some wallets into 2x2 squares, some into smaller pieces using square punch or use black cardstock picture viewer and mark corners and trim photos.
Decide which side you are going to affix 4x6 photos and 2x2 photos. Mark with a pencil. Using Modge Podge, sponge brush and brayer adhere patterned paper to unmarked sides of cube. I painted the Modge Podge onto the wood and then brayered the paper down. Adhere photos last using same method. Set aside to dry.
Die cut letters from cardstock (mine are 1 1/2") and adhere to blocks either with Modge Podge or other adhesive.
When Modge Podge is dry sand edges of blocks.
Use stamps, circle punches and Stayz-on Ink to embellish blocks.


Here are a few samples of other block sets that I found online.
For this sample she made one block for each member of her family
 For the sample below she made a block for each person in the family, put their initial on it and filled it with words starting with that initial.


For the sample below she made a block for each person in the family, put their initial on it and filled it with words starting with that initial.Thursday, December 15, 2011
Day 5 Stationery and Card Holder-10 Days of Handmade Gifts for $10 or less
Our fun handmade gift today is a stationery box- all made with cardstock and paper. The box opens up to reveal special spots for you to fill with some beautiful handmade cards, tags and envelopes.

 Lets get started!

 Lets get started!
Supplies:
2 pieces 12 x 12 Coordinating Paper
3 pieces 12 x 12 Cardstock (2 Coral, 1 Green)
Lined Paper
Lined Paper
2 feet each of 3 different ribbons or trims
2 Medium brads
2 Small brads
Tools & Adhesive: Trimmer, Scissors, dry adhesive like tape runner, super tape or photo tape, Glue dots or other adhesive for ribbon, stapler, scoring tool like Scor Pal, hole punch
2 Medium brads
2 Small brads
Tools & Adhesive: Trimmer, Scissors, dry adhesive like tape runner, super tape or photo tape, Glue dots or other adhesive for ribbon, stapler, scoring tool like Scor Pal, hole punch
Box Base:
Score a 12x12 piece of cardstock at 5” and 7”
Turn and score 3” and 9” in the other direction.
 Cut sides to score lines. Fold these cut pieces into the center and glue down for extra support. This will make the bottom of your card box.

Cut 1 3/4” off each of the TOP FLAPS ONLY. Score the bottom flaps at 1” and 11”.
Cut a piece of cardstock 8 1/4 x 4 1/4. Score both short sides and one long side at 1 1/4”. Trim corners and adhere to top of your stationery box-see photo
 Note and Tag Holders:
Cut a piece of cardstock 2x12, cut that into two pieces 5 1/2 x 2 and 4 1/2 x 2. Score both pieces at 1/2” and 1” from each short end. Apply adhesive and attach to top of card box-see photos.

 Box Lid:
Cut a piece of cardstock 10 1/8 x 6 1/8. Score at 2” on all sides. Trim corners and fold up to form lid.
Cut 1 3/4 x 12 and 1 3/4 x 7 strip of coordinating paper. Fit around lid, creasing where needed for corners. Adhere, trim off any extra.
Wrap ribbon around box lid, tie in the front. Add adhesive under ribbon to secure.

Score a 12x12 piece of cardstock at 5” and 7”
Turn and score 3” and 9” in the other direction.
Cut sides to score lines. Fold these cut pieces into the center and glue down for extra support. This will make the bottom of your card box.Cut 1 3/4” off each of the TOP FLAPS ONLY. Score the bottom flaps at 1” and 11”.
Cut a piece of cardstock 8 1/4 x 4 1/4. Score both short sides and one long side at 1 1/4”. Trim corners and adhere to top of your stationery box-see photo
 Note and Tag Holders:
Cut a piece of cardstock 2x12, cut that into two pieces 5 1/2 x 2 and 4 1/2 x 2. Score both pieces at 1/2” and 1” from each short end. Apply adhesive and attach to top of card box-see photos.
Box Lid:Cut a piece of cardstock 10 1/8 x 6 1/8. Score at 2” on all sides. Trim corners and fold up to form lid.
Cut 1 3/4 x 12 and 1 3/4 x 7 strip of coordinating paper. Fit around lid, creasing where needed for corners. Adhere, trim off any extra.
Wrap ribbon around box lid, tie in the front. Add adhesive under ribbon to secure.
Address Book/Notepad
Cut lined paper 3 1/2 x 6, fold in half.
Cut paper or cardstock for cover 6 1/2 x 3 3/4, score and fold in half. Insert paper, punch two holes and insert brads. Adhere address book to the bottom half of card box. Make sure to leave enough room for your pen.
Stamp Envelope
Cut a piece of paper or cardstock 2x3. Score at 1/2” on both short sides and one long side. Fold scored pieces under, trim corners slightly and glue down beside address book.
Pen Loop
Cut a piece of paper or cardstock 2 x 1 1/2”. Fold loosely in half to form a loop. Do not crease. Attach loop to stationery box bottom using brads to secure. You can also make a pen loop with a piece of ribbon.

Cover the Outside Panels of the Stationery BoxFront: 5 3/4 (w) x 4 3/4 (h)-make sure you do this AFTER you attach the pen loop.
Sides: 1 3/4 (w) x 4 3/4 (h)-cut two
Cover the Inside Panels of the Stationery Box
Note and Tag Holder Pockets:
Tag Pocket-2 1/4 (w) x 1 3/4 (h)
Note Pocket– 3 1/4 (w) x 1 3/4 (h)
Sides: Sides: 1 3/4 (w) x 4 3/4 (h)-cut two
Subscribe to:
Posts (Atom)