

 Supply List:
6 Lunch Size Paper Bags
3-5 sheets 12x12 coordinating patterned papers-I used 5 sheets of My Minds Eye Patterned Paper
5 sheets 12x12 cardstock
4-6 coordinating ribbons or trim for tags and embellishment-1 or 2 feet of each
Embellishments: I used My Minds Eye Punch Out Tags, Creative Café felt flowers, buttons, decorative brads
5 sheets 12x12 cardstock
4-6 coordinating ribbons or trim for tags and embellishment-1 or 2 feet of each
Embellishments: I used My Minds Eye Punch Out Tags, Creative Café felt flowers, buttons, decorative brads
Get our your favorite stamps, rub ons, stickers to embellish your book!
To create book
Cut folded end off bags so they measure 7 1/2” long.
It is easier to cut and assemble each page before you bind book together. Cut 3 x 5 1/4 piece of your other coordinating paper that you will use to bind your edge. Lightly fold in half. Place over binding and punch using Cropadile through all layers, 1” from ends and 1/2” from binding. Cut 15” of ribbon to tie and set aside with binding piece. When all pages are done you will tie with 15” of ribbon, reinforce holes if desired with paper punch outs or boshers.
To create pages and pocket inserts
Cut each of your patterned papers and cardstock pieces into 6x12 pieces, we will use these strips to create each page. All pages are 6” wide x 5” tall.
 Cover-
Cut 6x5 piece of patterned paper. Die cut letters using Cricut for title-approx 2” Letters. Add stamped words and tag. Use a scrap piece of cardstock to add words to your tag if the pattern is too bold. Add decorative brad and ribbon to tag and adhere to cover.
 Left Page-Stripe 6x5
Dot 6x1-adhere onto stripe
Thread tag onto rick rack and staple rick rack onto paper before you adhere to page.
Right Page-Dot 6x5
Pink Cardstock-5x4
Staple ribbons to top edge of cardstock mat.
 Left Page-Brown Cardstock 6x5
Pattern 5 3/4 x 4 3/4
Wrap ribbon around left edge
Stamp on circle tag and tie onto ribbon.
Right Page-Dark Pink cardstock 6x7, fold up 2” on bottom
Pattern 5 3/4 x 1 3/4, add to pocket front, use brads to create pocket.
Tags-use punch out tag from sheet and staple ribbon to top
Cut 3x5 tag from Lt Pink cardstock-add flower and button.
 Left page-Green cardstock 6x5
Pattern 1x5
Punch out tags from sheet, staple ribbon onto edges and adhere
Right Page-Pattern 6x5
Cut 2” square of green cardstock and adhere to wrong side of right corner, fold down and secure with brad
Add circle tag behind

Left page-5x6 Med Pink cardstock
Brown dot-4 1/2 x 4 1/2
Use punch out tag and patterned paper scrap, stamp words onto scrap and staple ribbon to tag.
Right Page-8x5 Med Pink cardstock, fold 2” along right edge for flap
Pattern-5 3/4 x 4 3/4
Stripe-1 3/4 x 4 3/4
Light Pink-1 3/4 x 4 3/4
Stamp words on front of flap, add flower and punch out tag.
Staple tab onto flap

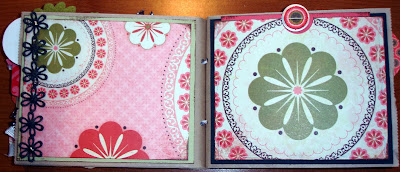 Left Page-5x6 Patterned paper.
Attach felt trim with brads at top and bottom
Right Page-5x6 Brown cardstock
Pattern-4 3/4 x 5 3/4, punch out half circle along top. Staple to brown cardstock to create pocket.
Medium Pink-5x4, add metal rim tag and punch out top top.
 Back Cover
Cardstock 2 1/2 x 6
Pattern 2 1/2 x 6
Dot 1x6
Stamp “Handmade By” and sign your name
Bind book by wrapping binding piece around edge and threading through all layers. Knot ribbon and then tie into bow
 Pocket Inserts
Each piece is 5x6
Embellish the edges as desired with punch out tags, ribbon, etc.
Green-3 circle tabs, add felt flower from trim to each
Dark Pink-Fold over tag from punch out sheet
Brown-Staple on rick rack and ribbon
Lt Pink-File folder tab, stamp word on it, staple to edge
Green-Punch out circle tag from sheet
Med Pink-Use punch out strip from sheet, add punch out tag.
No comments:
Post a Comment